Barn Pen Construction
Before we got started, we had to move several stacks of lumber out of the way. The cages at the north end were moved out into the aisle as well.
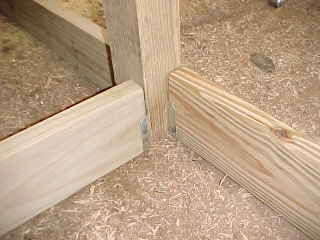
Detail of the treated 2x6 boards that frame the bottom of the pens connected to the 4x4 posts. We used Simpson "Stong-Tie" metal connecting plates and power drive 1 1/4" screws exclusively. This made the lumber very easy to put together and allows us to rearrange it later if we need to.
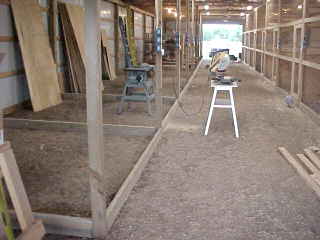
After the first day, we had all the 2x6 floor-contact boards in place. These were placed in close contact with the ground, so in many cases they aren't "level" because the ground isn't always level.
The first row of 2x4's was leveled as each was installed. These were mounted 48" up (center to center) from the 2x6's on the ground for mounting the plywood. Here Justine is beginning to position the plywood in each pen.
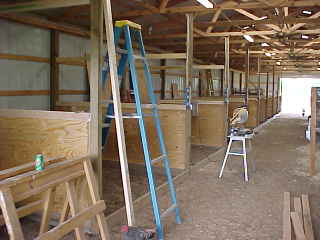
All the plywood is now mounted and the next row of 2x4's is going up 36" (center to center) from the first, spaced for 3 foot wide chicken wire.

Detail of the Simpson "Strong-Tie" part number FB24 metal connectors that we used to attach all the lumber together. These were about 30 cents each at Lowe's.